“We want to test 3 cities in 14 days”: A Simple LinkedIn Creator Test Plan
A practical, no-fluff playbook for brands that want to validate city-level demand fast using LinkedIn creators.
Co-founder @anchors ; Disrupting a $23 billion Industry | NIFT New Delhi
TLDR
- Use LinkedIn creators to test 3 cities in 14 days with clear hypotheses.
- Pick 2–3 nano or micro creators per city and one message angle each.
- Track city-level engagement, clicks, and intent—not vanity metrics.
- Decide fast: scale, refine, or stop based on real signals.
This guide is written for brands across industries that want to run a fast city-level experiment on LinkedIn. If you’re launching in new markets, validating demand, or testing messaging before a bigger spend, this playbook shows how to do it with LinkedIn creators—without overthinking or heavy operations.
The goal is not perfection. The goal is signal: which city shows traction, which message resonates, and whether it’s worth scaling.
Why LinkedIn creators work for city-level tests
When brands say “we want to test 3 cities in 14 days,” they usually need answers to simple questions:
- Does this city care about our problem?
- Which message gets attention?
- Is it worth sales or marketing effort here?
LinkedIn creators are useful here because:
- Their audience is already segmented by location, role, and seniority.
- You can test content + distribution together, not just ads.
- Early results show up in days, not months.
Instead of guessing with surveys or waiting for outbound data, creators give you real-market reactions.
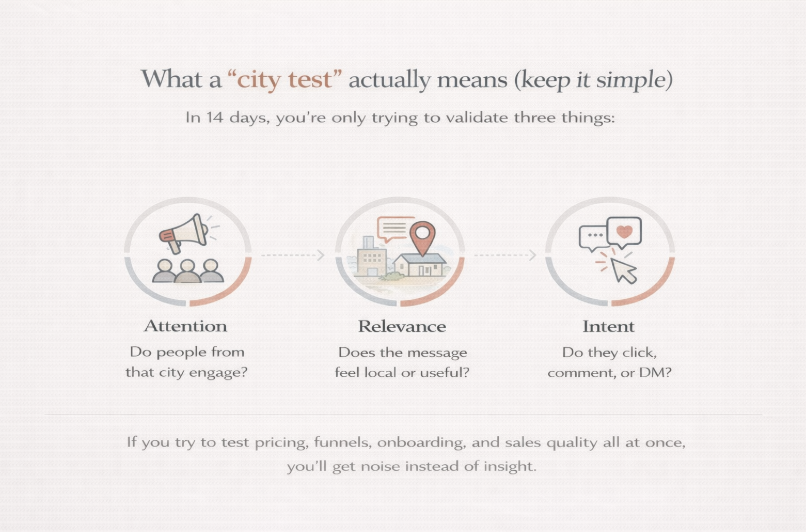
What a “city test” actually means (keep it simple)
A city test is not a full GTM launch. In 14 days, you’re only trying to validate three things:
- Attention: Do people from that city engage?
- Relevance: Does the message feel local or useful?
- Intent: Do they click, comment, or DM?
If you try to test pricing, funnels, onboarding, and sales quality all at once, you’ll get noise instead of insight.
The 14-day city test framework (overview)
Here’s the simple loop you’ll follow:
- Day 1–2: Define hypothesis and success signal
- Day 3–4: Shortlist city-relevant creators
- Day 5: Finalize briefs and messaging angles
- Day 6–10: Content goes live
- Day 11–14: Read results and decide next steps
This mirrors the brief → shortlist → execute → report loop that platforms like anchors are built to support, especially when speed matters.
Step 1: Define one clear hypothesis per city
Before you pick creators, write down a simple hypothesis for each city.
- “In City A, professionals care about problem X.”
- “In City B, founders respond better to outcome Y.”
- “In City C, messaging around career growth works better than cost.”
Avoid generic goals like “brand awareness.” Instead, decide what signal you’ll treat as success:
- Post engagement from city-specific profiles
- Clicks from that geography
- Inbound comments or DMs mentioning the city problem
Step 2: Pick the right creator mix for city tests
For pilots, nano and micro creators usually work best.
On LinkedIn, a practical range is:
- Nano creators: ~1,000–10,000 followers
- Micro creators: ~10,000–50,000 followers
Why they work well for city tests:
- Audiences are often more geographically concentrated.
- Engagement feels more conversational and honest.
- You can test multiple voices without large commitments.
Example creator profiles (generic):
- Startup operator in Bengaluru (~6k followers)
- HR leadership creator in Delhi NCR (~12k followers)
- Sales or growth professional in Mumbai (~18k followers)
How many creators per city?
For a 14-day test:
- 2–3 creators per city is enough.
- Use similar creator sizes across cities to keep results comparable.
This means ~6–9 creators total for a 3-city experiment.
Step 3: Lock one message angle per city
A common mistake is changing everything at once.
Instead:
- Keep the product and CTA constant.
- Vary the primary message angle by city.
Examples of message angles:
- City A: “How professionals in City A solve problem X”
- City B: “What founders in City B get wrong about problem X”
- City C: “Why City C teams are rethinking process Y”
This makes your results readable instead of confusing.
Step 4: Write a creator brief that fits a 14-day test
Your brief should be short and focused. Over-briefing slows everything down.
Simple creator brief template
Objective: Test interest for [problem/solution] in [city]. Key angle: [one message angle]. Audience: [role + seniority]. Content format: Text post or text + image. CTA: [comment, click, or DM]. Timing: Post within [date range].
Let creators use their own voice. You’re testing market response, not ad copy.
This is where tools like anchors help by standardizing briefs and reducing back-and-forth, especially when you’re coordinating multiple cities at once.
Step 5: Execution rules (keep control variables tight)
To make your test readable:
- Post within a tight 4–5 day window.
- Use the same CTA across all cities.
- Avoid overlapping campaigns or announcements.
You’re not optimizing yet—you’re observing.
Step 6: What to track (and what to ignore)
For a city test, focus on directional metrics, not perfection.
- City-level impressions and engagement
- Clicks or profile visits from that geography
- Quality of comments (local context vs generic)
Ignore:
- Absolute follower growth
- Virality comparisons with large creators
- One-off spikes without context
Platforms that use verified LinkedIn data instead of screenshots—like anchors—make this easier when you’re comparing cities side by side.
Decision matrix: Interpreting city test results
Nano creators
- Goal: Early city signal.
- Use Case: Ideal when the audience is strictly local.
- Avoid When: You need instant scale.
- Metrics: Comments, Direct Messages (DMs).
- Watch Out: Don't judge them by impressions only; look for conversation depth.
Micro creators
- Goal: Message validation.
- Use Case: Works best when targeting specific professional roles matters.
- Avoid When: Budget is very tight.
- Metrics: Click-Through Rate (CTR), engagement.
- Watch Out: Avoid mixing too many angles; keep the messaging focused.
Single angle per city
- Goal: Clear insight.
- Use Case: Essential when you want comparability between different locations.
- Avoid When: You are prioritizing creativity over data.
- Metrics: City-wise deltas (differences in performance between cities).
- Watch Out: Never change your Call to Action (CTA) in the middle of a test.
Realistic mini examples (what success looks like)
Example 1: B2B service brand
- Objective: Validate demand in 3 metro cities
- Creator type: Micro operators
- Angle: “How teams in this city handle X”
- Success signal: Higher {{CTR}} and local comments in one city
Example 2: Career-focused product
- Objective: Test professional interest
- Creator type: Nano career creators
- Angle: “Common mistake professionals in this city make”
- Success signal: More {{signups}} from one geography
Common mistakes we’ve seen
- Testing too many cities at once
- Using creators with no local audience
- Changing message angles mid-campaign
- Over-optimizing after one post
- Relying on screenshots instead of real data
How to decide what to do after 14 days
At the end of the test, make one of three decisions:
- Double down: One city shows clear traction → expand creators or budget.
- Refine: Signal is mixed → adjust message and retest.
- Pause: No clear response → save spend and revisit later.
The win is clarity, not just performance.
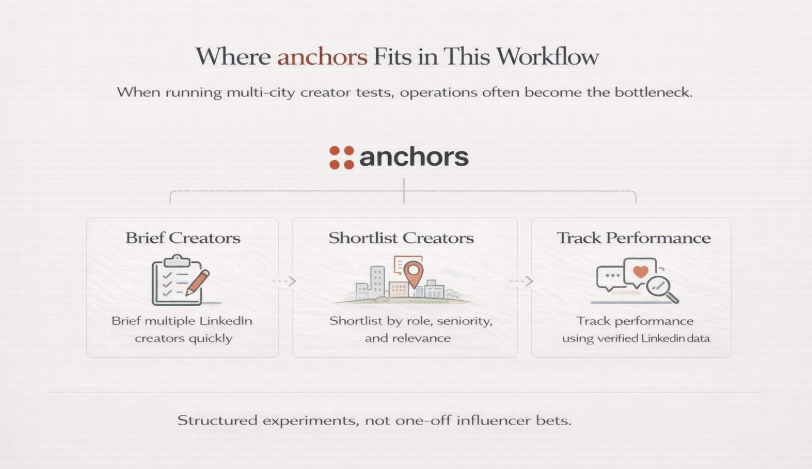
Where anchors fits in this workflow
When running multi-city creator tests, operations often become the bottleneck.
anchors helps brands:
- Brief multiple LinkedIn creators quickly
- Shortlist by role, seniority, and relevance
- Track performance using verified LinkedIn data
This makes it easier to treat city tests like structured experiments, not one-off influencer bets.
Explore More Articles
Discover our latest insights on SEO, content marketing, and digital strategy. Explore our curated collection of articles to enhance your digital presence.
← Scroll to explore more →